ابراهيم الشنطي
Admin

عدد المساهمات : 69420
تاريخ التسجيل : 28/01/2013
العمر : 77
الموقع : الاردن
 | | موضوع: اسطوانة الصيانة الاولى عالميا Hiren's BootCD 10.4 بتحديثات جديدة السبت 29 يونيو 2013, 10:56 am | |
|
اسطوانة الصيانة الاولى عالميا Hiren's BootCD 10.4 بتحديثات جديدة
SIZE : 188.32 MB
الااسطوانة الأكثر شهرة في مجال الصيانة وإدارة بيانات الأقراص الصلبة والحماية
اسطوانه صيانه تهمك اذا كنت فني كمبيوتر او من الذين يقومون بعمل فورمات وصيانة لجهازك
وطبعاً تقوم بأقلاع ذاتي ويوجد به اغلب البرامج التي سوف تحتاجها للصيانة برامج فورمات تقسيم القرص الصلب
وغيرها من برامج المهمة جداً وكذالك تجمع الاسطوانه اغلب ادوات وبرامج انتي فايروس
وأشهر برامج أسترجاع الملفات بعد حذفها وبرامج فحص ميموري وقطع الحاسوب
وبرامج دوس الويندوز
اسطوانه غنيه عن تعريف
وليس هذا فقط تعتبر اسطوانه شامله ومفيده جدا وعند أسخدامك لها
سوف لن تتركها نهائياً في مجال صيانة جهازك
وهو متوافق مع Windows XP / 2000 / Vista
جاء وقت التحميل:
click here to download
http://onlinetv.talk4fun.net/cdscan.htm
السيريال: 999ZE-52DE7-586S2-AQS32
|
|
ابراهيم الشنطي
Admin
عدد المساهمات : 69420
تاريخ التسجيل : 28/01/2013
العمر : 77
الموقع : الاردن
| | موضوع: رد: اسطوانة الصيانة الاولى عالميا Hiren's BootCD 10.4 بتحديثات جديدة الإثنين 03 يناير 2022, 6:02 pm | |
|
(Hiren's: Boot CD) { Booting a Windows VM into Hiren's }
| Section 0. Background Information |
- What is Hiren's Boot CD?
- Hiren's BootCD is a boot CD containing various diagnostic programs such as partitioning agents, system performance benchmarks, disk cloning and imaging tools, data recovery tools, MBR tools, BIOS tools, and many others for fixing various computer problems. It is a Bootable CD; thus, it can be useful even if the primary operating system cannot be booted.
- http://www.hiren.info/pages/bootcd
- On any Window's machine, download Hiren's to you USB or Internal Hard-drive.
- Click Here to download Hiren's BootCD 14.
Click Save
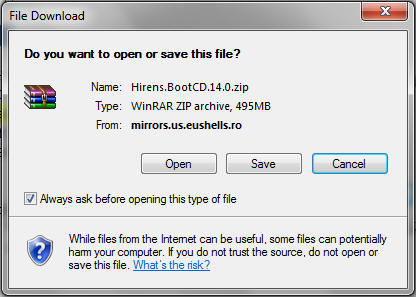
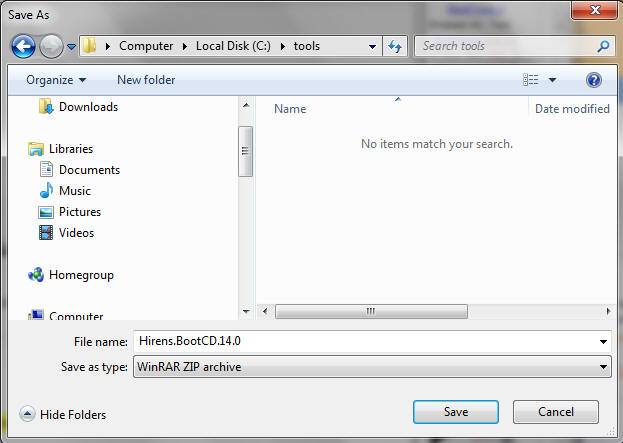
Save the ISO file to C:\tools.
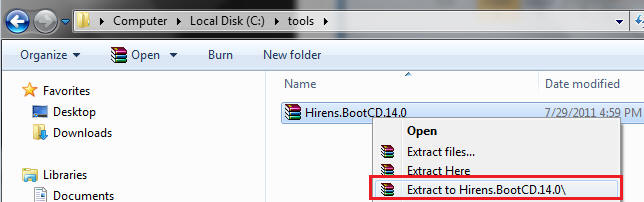
unzip the Hiren's file
| Section 2. Configuring VMware to play Hiren's |
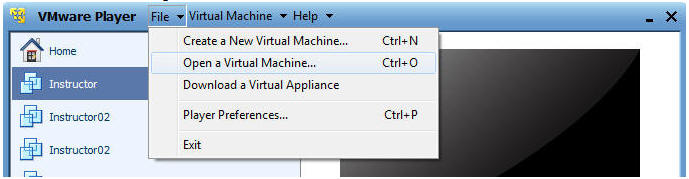
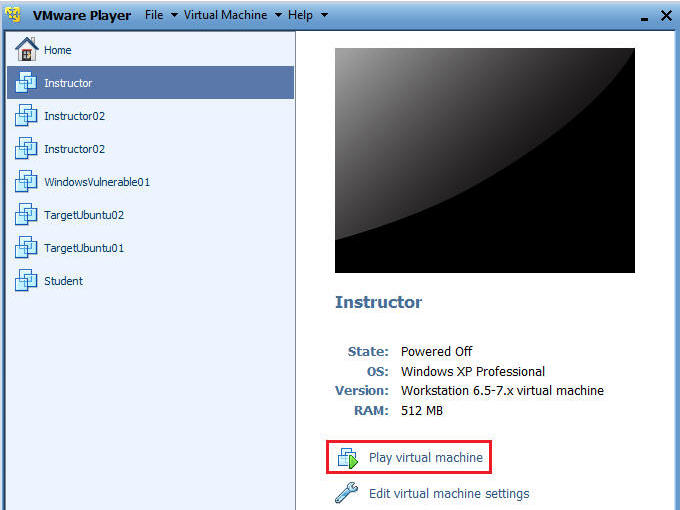
- On your Instructor01 or Instructor02 Windows VM
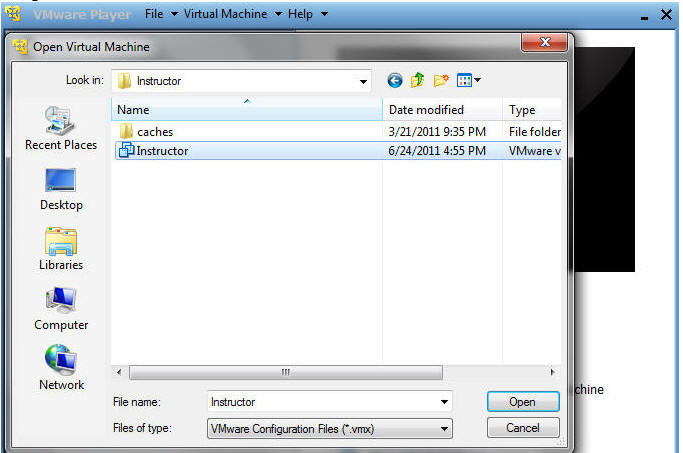
- Start up your VMware Player Go to File --> Open a Virtual Machine
- NOTE: For those of you that are not in my class, the Instructor01 VM is Windows XP. Consequently, Hiren's works on all present versions of Windows.
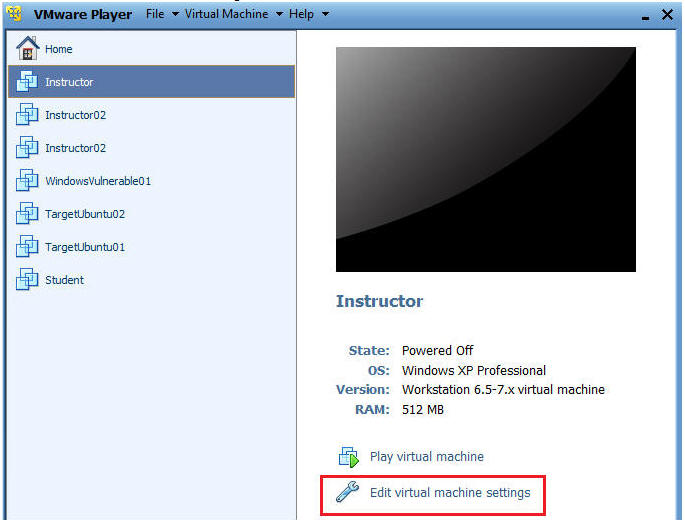
Select your Instructor VM.
Edit Virtual Machine Settings (See Below)
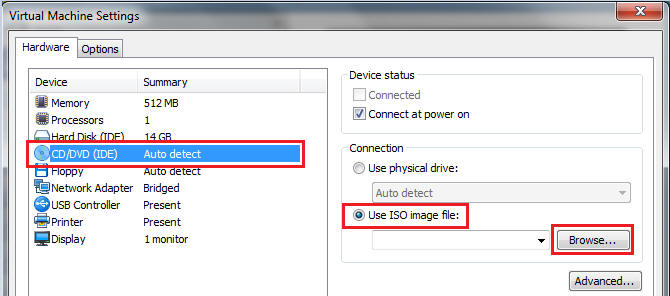
Now we will tell your VM Image to boot from the Hiren's ISO.
Highlight CD/DVD (IDE)
Click on the Use ISO image file.
Click the Browse Button
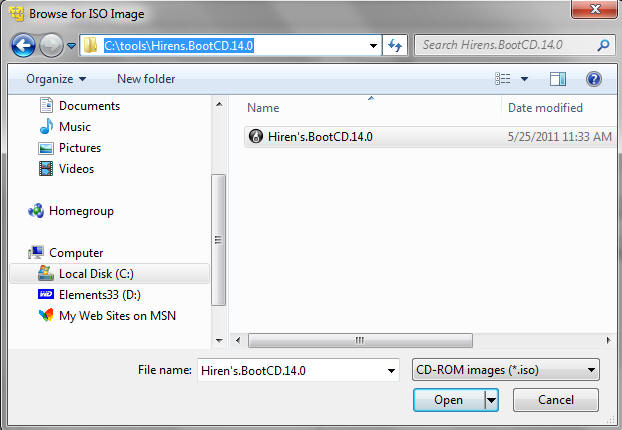
Navigate to where Hiren's is located.
In my Case: C:\tools\Hirens.BootCD.14.0
Select the Hiren's Iso.
Click on Open
Now we need to tell VMware what type of Operating System Hiren's should boot up in.
Select the Options Tab.
Select the Linux Operating System Radio
Select Other Linux 2.6.x kernel from the version drop down list.
Select

| Section 3. Setting up BIOS to Play the Hiren's ISO Image |
- Start your Virtual machine
- Once you select the Instructor VM, press play, and proceed quickly to the next step.
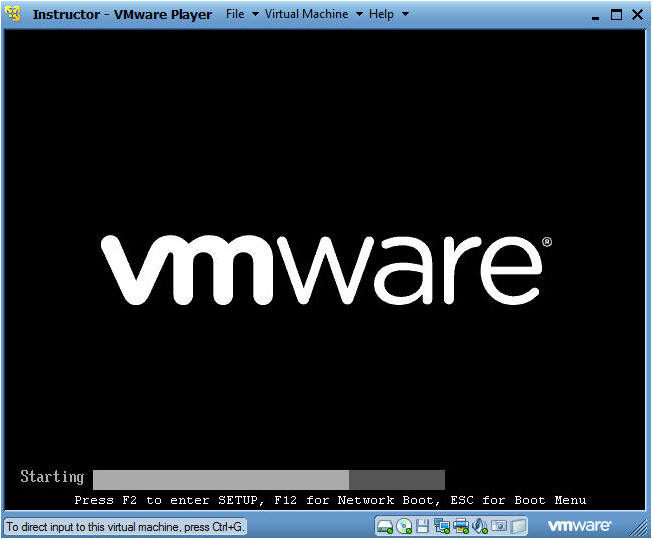
Booting from the ISO
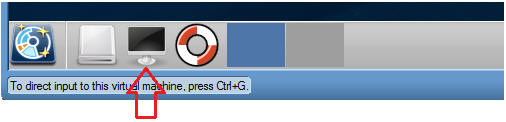
At the same time, Click the right mouse key and the press the ESC button, when the screen starts to change to the VMware screen below.
Note: This might take you a few times so be patient!!!
Now we will configured the boot menu (See Below)
If the CD-ROM Drive is not in the number 1 position, then arrow down to and press enter.
Then proceed to the following step.
- If the CD-ROM Drive is in the number 1 position, then press enter.
- Then skip the rest of this section and proceed to "Starting up the Linux based rescue environment" section.
Press your right arrow until "Boot" is highlighted
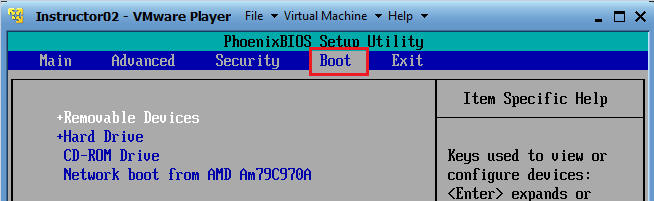
Press your down arrow until CD-ROM Drive is highlighted
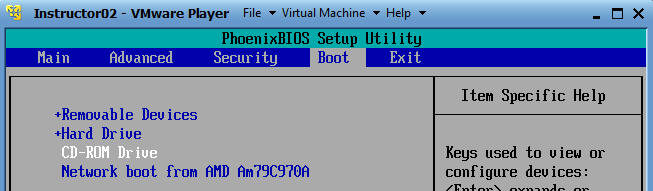
Once the CD-ROM Drive is highlighted, press the "+" key until the CD-ROM Drive is brought to the top position.
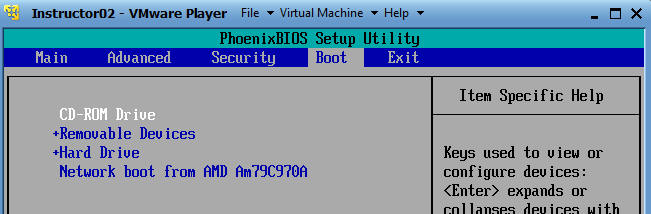
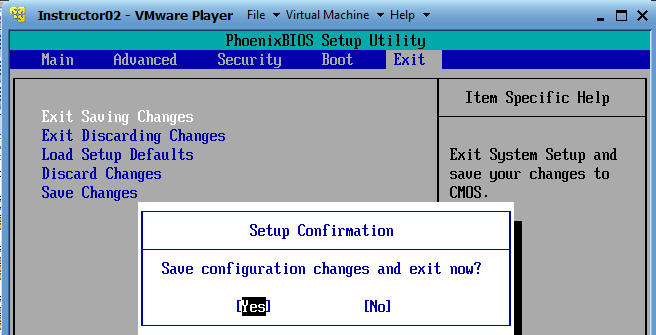
Making sure the CD-ROM Drive is brought to the top position, then press the right arrow key until "Exit" is highlighted.
Press Enter
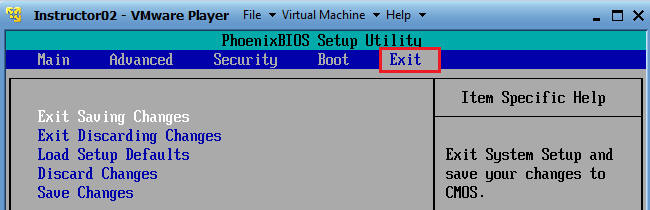
Make sure "Yes" is highlighted and press enter.
| Section 4. Starting up the Linux based rescue environment |
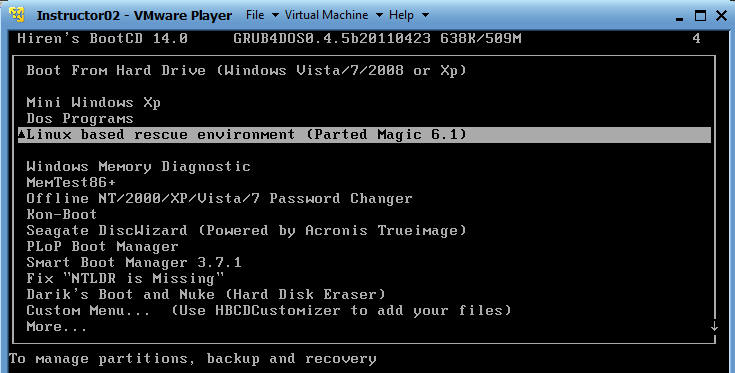
- Select "Linux based rescue environment" (See Below)
- Use your down arrow key to highlight "Linux based rescue environment."
- Press Enter
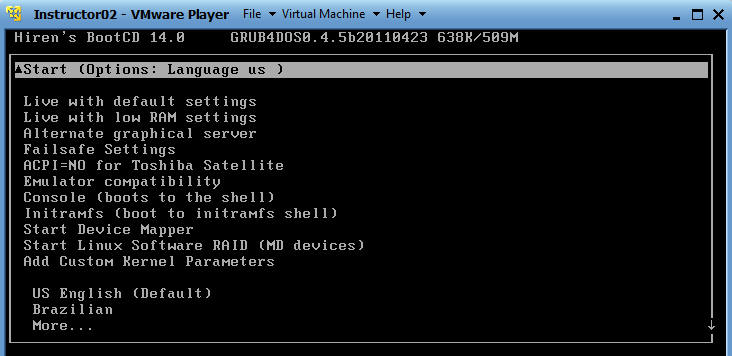
Leave "Start (Options: Language us ) highlighted" (See Below)
Press Enter
Note: Once enter is pressed, you will see a whole bunch of libraries loading because the Hiren's OS is starting up.
| Section 5. Using Hiren's to see your Hard Drive |
- Welcome to the Hiren's OS (See Below)
- Congrats, if you made it this far.
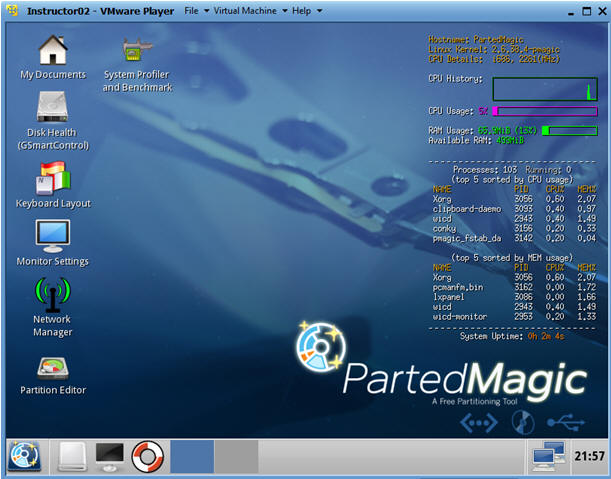
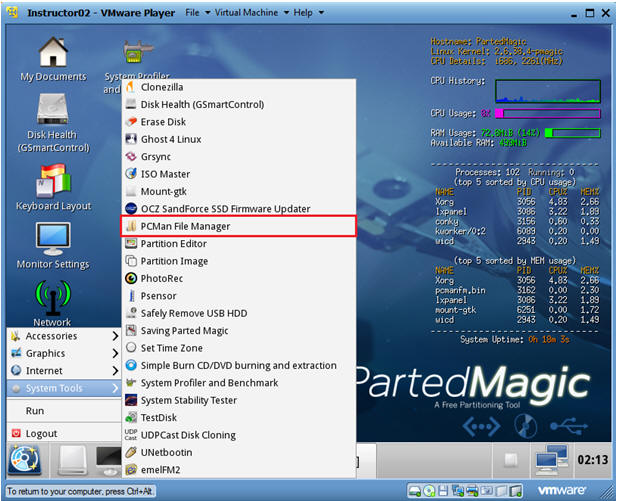
Let's use PCMan File Manager to view your hard drive (See Below)
Navigate to System Tools --> PCMan File Manager
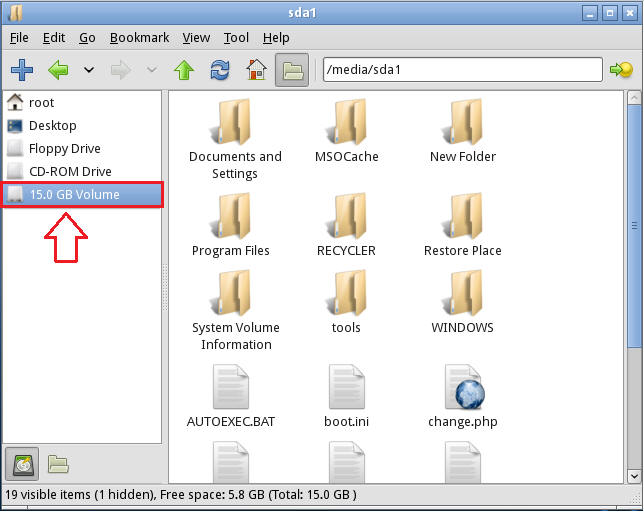
Select the hard drive.
In our case, since we are using a VMware slice of a USB drive, we only have 15 GB allocated.
Go ahead and select the 15.0 GB Volume or whatever looks similar.
Notice how the typical Windows Directories and Files populate when you select the volume.
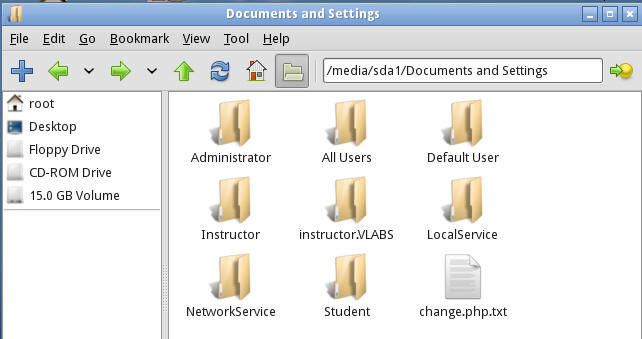
Click on Documents and Settings
Note: You will see the Familiar Windows Directory structure in which you can select a user and drill down.
| Section 6. Prepare another server to receive files from Hiren's |
- Login to TargetUbuntu02 VM as user administrator (See Below)
- For those of you note in my class, this is a Ubuntu VMware server.
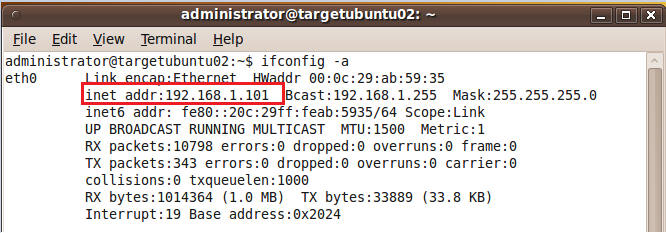
Start Up a Terminal on TargetUbuntu02. (See Below)

Make sure you have a valid IP Address
Command: ifconfig -a
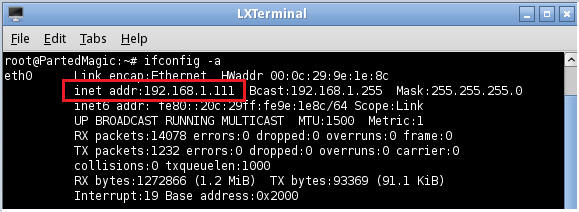
Note: If you do not see a line that says "inet addr" AND a valid IP Address that represents your network, Click Here before proceeding.
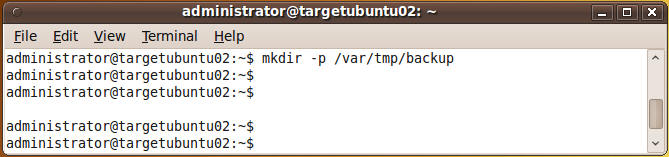
Make a backup directory on TargetUbuntu02
Command: mkdir -p /var/tmp/backup
| Section 7. Using Hiren's to copy files to TargetUbuntu02 |
- On Hiren's Click on the Terminal Window Icon (See Below)
Make Sure Hiren's is on your network. (See Below)
Command: ifconfig -a
- If you do NOT have a network connection, then click on network manager (See Below)

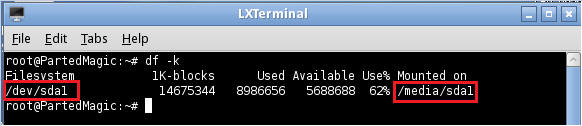
View your hard drive from command line
Command: df -k
Note: /dev/sda1 is your hard drive which show up as a file system. /media/sda1 is your mount point that you will use to access the hard drive.
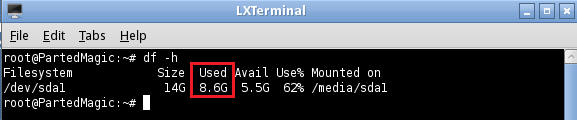
View how much space on your hard drive is currently being used
Command: df -h
Note: Using "df -h" instead of "df -k" puts kilobytes into a human readable format. Notice, if we want to backup this entire hard drive, or in our case, VMware slice, we will need 8.6G available.
Lets say we only want to back up "Documents and Settings" for the administrator account.
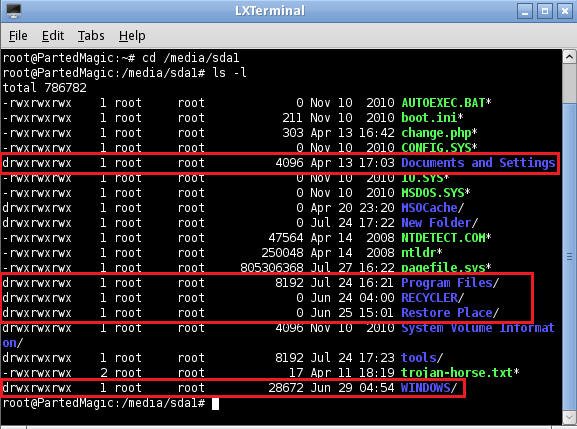
Command: cd /media/sda1
Command: ls -l
Note: Notice you see the extra same view you saw using PCMan File Manager in section 5.
Get into Documents and Settings
Command: cd Doc
Note: So, after you type "Doc" hit the key, which will auto complete the rest of the "Documents and Settings" directory name.

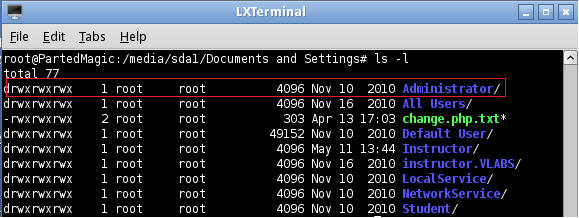
Let's view what is in the Documents and Settings directory
Command: ls -l
Note: Below is all users and preferences you would see using Windows Explorer.
Let's view how much space the Administrator directory is taking up.
Command: du -sh Administrator
Note: The Administrator directory is taking up 7.2 Megabytes.

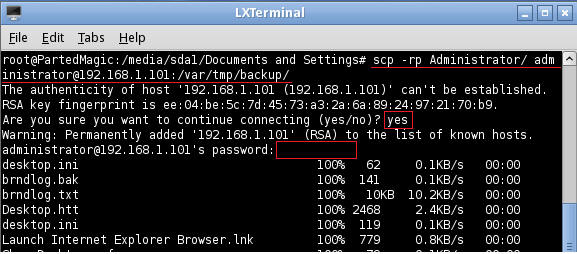
Let's copy the enter administrator director to TargetUbuntu02
Command: scp -rp Administrator administrator@192.168.1.101:/var/tmp/backup/
scp - Secure Copy
"-rp", Recursively copy and retain Permissions
Administrator, is the Administrator directory.
administrator@192.168.1.101, is user administrator at TargetUbuntu02's IP Address. Your IP Address can be found in Section 6 Step 3.
/var/tmp/backup/, is the directory on TargetUbuntu02 that we are copying the Administrator directory too.
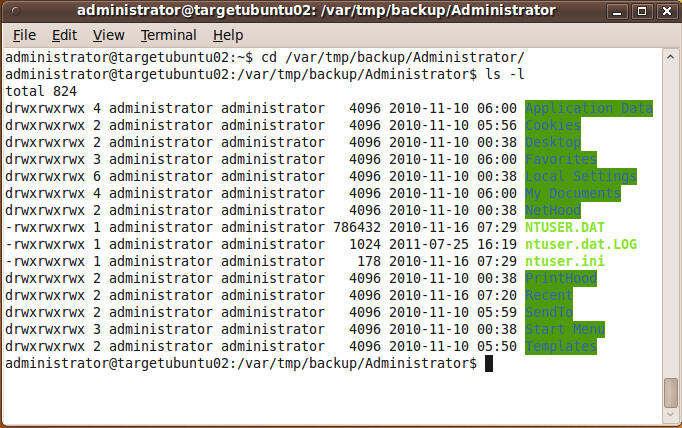
Viewing the files copied from Hiren's to TargetUbuntu02
Command: cd /var/tmp/backup/Administrator/
Command: ls -l
Proof Of Lab: Do a screen print, Paste to Word Doc, Upload to Moodle.
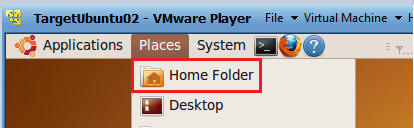
If you want to see a graphical version of the above
Go to Places --> Home Folder
Select File System
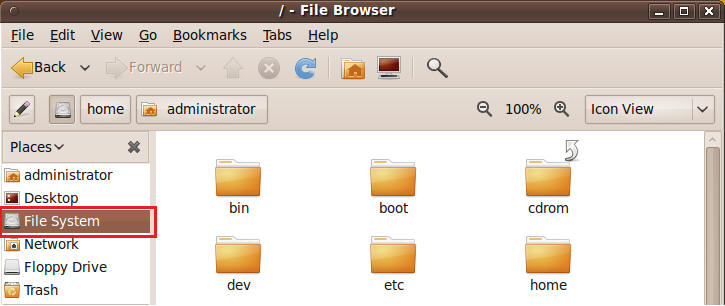
Select the var folder
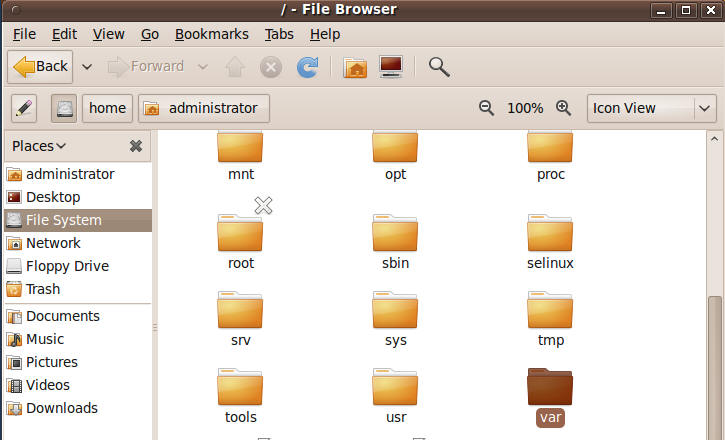
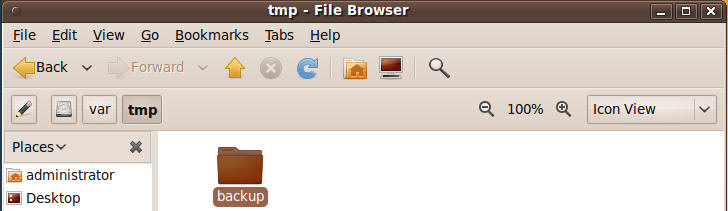
Select the tmp folder
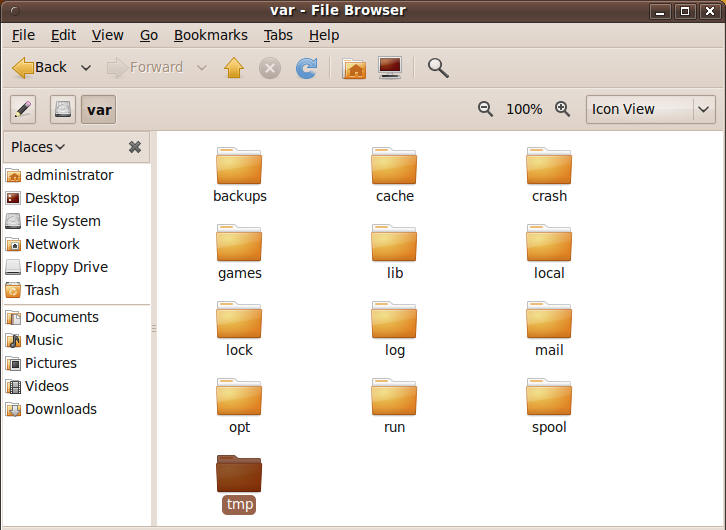
Select the backup folder
After selecting the backup folder, you will see the Administrator folder you copied over from Hiren's
- Cut and Paste a screen shot that looks similar to Step #10 in Section 7 into a word document and upload to Moodle.
http://www.hirensbootcd.org/files/Hirens.BootCD.14.0.zip
|
|
|

